Showing posts with label paint. Show all posts

Sunday, October 7, 2012

Guest Bathroom Re-Do

When we first bought our house, we knew we wanted to re-do and re-paint all the rooms. The only room that I kind of liked was the guest bathroom. It was a deep blue that we liked, so Eliza and I painted a fresh coat of the same color. The only problem was that once I painted all the other rooms in the house, I realized that the deep blue didn't really go well with the other light & airy colors that we had used throughout the house. So I've been dying to repaint this bathroom! My friend Melissa Wilson has a really pretty greyish green color on one of her walls and I loved it! When I asked her about it, she said she had almost a gallon left that I could use... made me so happy.  :)  So I finally repainted the guest bathroom a week or two ago & put some much-needed art on the wall. 
This was the guest bathroom before I repainted it.
And this is the new color.  { Valspar "Smoke Infusion" }
Emily came & hung out with Davis while I painted.  :)
And I added some art work to the empty wall.
They're maps of New York, Chicago, and Boston.
The background color of the maps matches the walls almost perfectly!
Well, there you go... our new {calmer} guest bathroom. 
Melissa, you're awesome.  Thanks so much!!  :)

Saturday, September 3, 2011

Dining room ledge

We put up board & batten in our dining room & I really, really love it.  But I'll be honest... when we moved in, decorating above the ledge was not Hannah's top priority.  We randomly threw things up there when we were unpacking if we weren't sure where else to put them.  It looked like a mish-mash of a few picture frames and some other nick-nacks.  So... Goal #1 for last weekend: decorate the ledge and make it look cohesive & planned.  Goal #2:  Don't spend a lot of money doing it.  Here's how it turned out.
This was the random collection that originally ended
up on the ledge after we moved in.  Not my fav.
Step 1: Went to Value Village thrift store &
picked up a bunch of random picture frames.
Step 2: Got this dirty window from the free pile
at Architectural Salvage downtown. 

Step 3: Arranged everything on
the ledge how I wanted it.


Step 4: Bought spray paint from Home Depot.
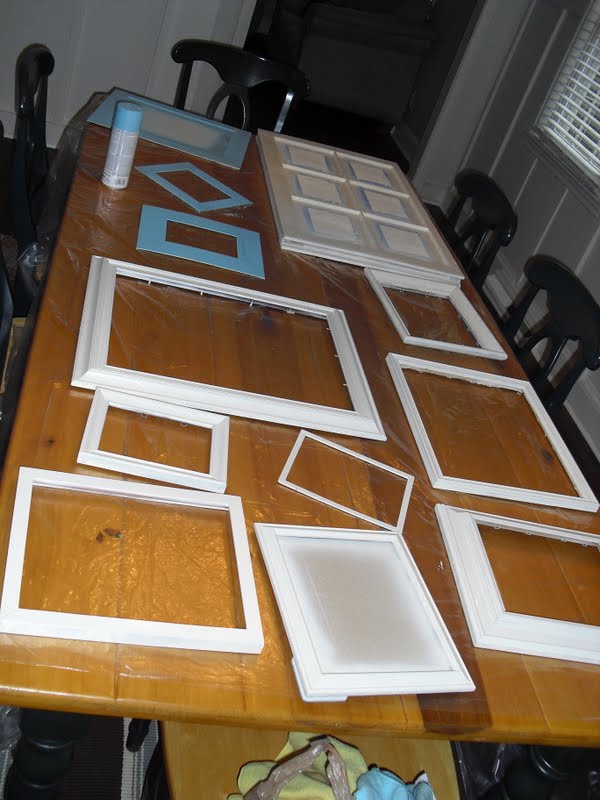
Step 5: Arranged everything on a
tarp outside to be painted.
Step 6:  Painted frames & window Antique White 
Step 7:  Cleaned & scraped the window.
Step 8:  Got some photos developed at Costco
and arranged them in the frames.
Step 9:  Arranged everything on the ledge.  :)


We got this in Nicaragua this summer. 
And we got these in Nicaragua too.  :)


Overall it only cost about $30.  I can handle that.
I also got this at Value Village for $3!
I love these little pitchers.
Especially when they have flowers in them.   :)
I really love my dining room.  :)  The biggest reason I love my dining room is because we're actually able to have more than 2 friends over at a time and we all have seats to sit in!

Sunday, August 14, 2011

Finishing touches!

Once we got all the big things in the house done & the rooms painted, all we had to do was some finishing touches before we could move in!  We spent 3 days painting trim & probably a day and a half finishing up the electrical work.  
There were no baseboards, window moldings, door moldings,
or crown moldings in a lot of the rooms.
Or shoe moldings.  So we had to add those.
But once they were added, they needed to all be painted white.
So my family came over and helped a lot with trim!
Mom & Isaac
Finished all the trim!
Then we had to hang shower curtains.
And Jake came over to finish the electrical work.
Then Aaron installed all the plantation blinds...
...and Eliza & I shortened them to the right lengths.
I heart plantation blinds.  :)
Pictures of the finished product coming soon!